Mid-Hinged Pole Operation Guide TP-007
Download PDFWarning
Mid-hinged poles use closely counter balanced to enable safe operation. The balance weights supplied are not to be reduced or added to without the consent of International Utility Poles. The number of luminaires is not to be added to or reduced or changed for different weight luminaires without the consent of International Utility Poles. Unauthorised changes above may cause the pole to become unsafe to operate and may result in serious injury or death.
Lowering Equipment
- A 12mm diameter rope of length at least 1.5 times the pole height. Double braided rope is recommended.
- Riggers gloves for a firm grip on the rope.
- Use of a solid fixed item to secure the rope to, for example, a bull bar of a vehicle.
Lowering
- Turn the power off to the luminaires before beginning the lowering operation and then
attach a 12mm rope securely to the looped hook at the base of the apron. - Secure the bottom end of the rope to a fixed item capable of holding the pole top
weight. Undo the 4 x hex headed securing bolts located at the base of the apron.
Unlock and remove the padlock. Caution: ensure and check that the counter
balance weight bolts have not loosened or come undone. - On the very first attempt at lowering a new mid-hinged pole, keep the rope tied to the
fixed item until the operator feels comfortable with the handling. At which point the
rope may be untied from the fixed item. - The operator is to take position by standing behind and in-line with the apron’s swing
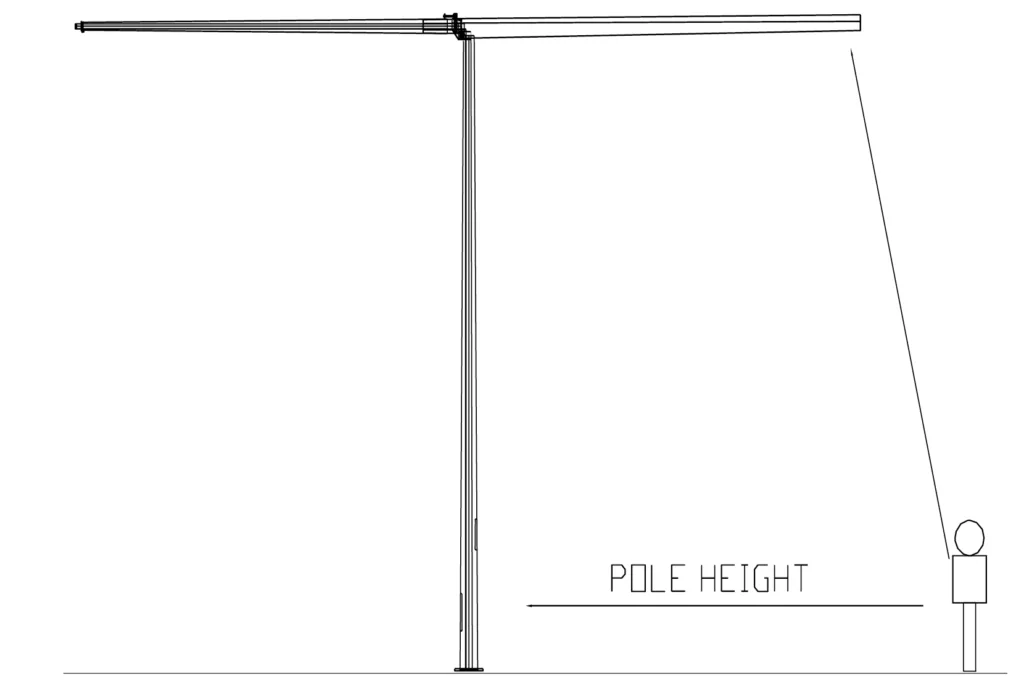
direction. - Holding the rope from a safe distance, initially only pull the apron free from the fixed
base section and allow the top section to slowly swing downwards without effort and
on its own accord. It is important that the lowering momentum developed is closely
controlled. In particular, slow the momentum in a controlled way as the headframe
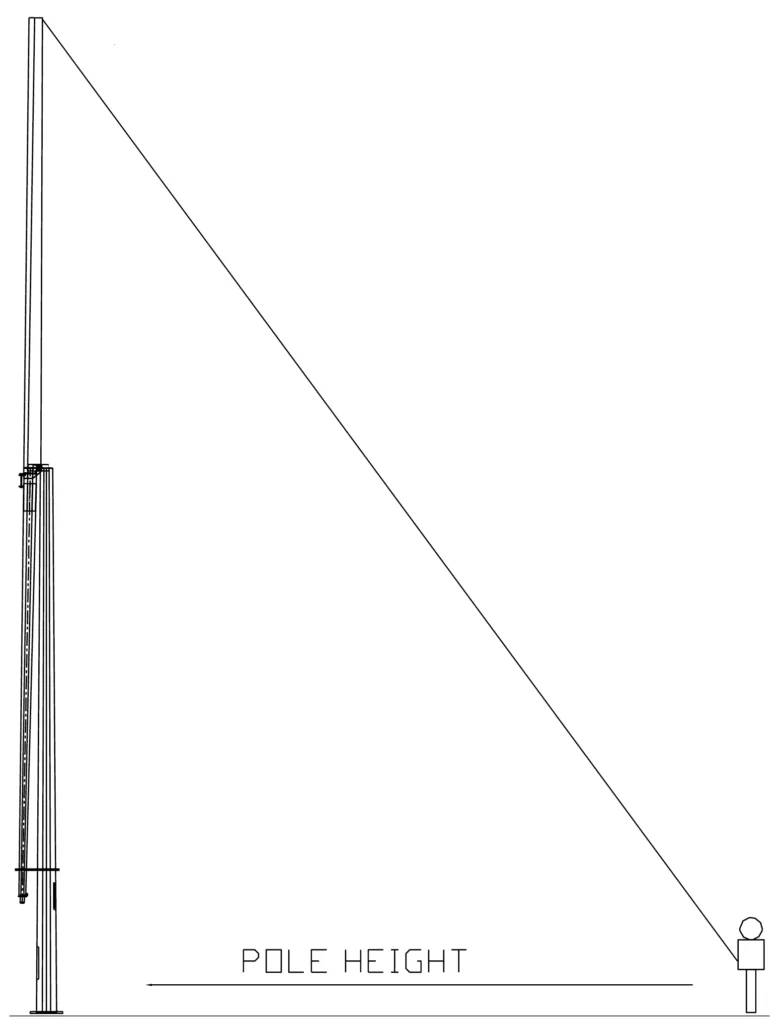
and luminaires approach ground level. See Figure 1. - While lowering, the operator should slowly move to a position shown in Figures 2 and
- While the top section is being lowered ensure that there is no torsional rotation of
the apron as this may cause damage to the apron and the hinge pin. This can be
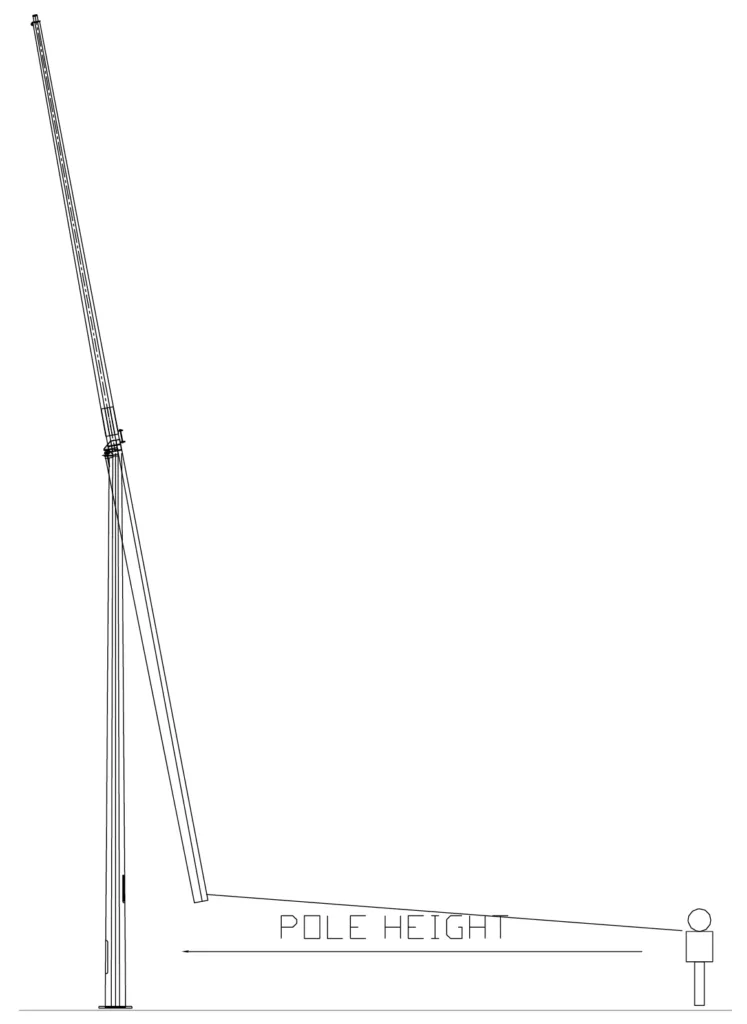
avoided by keeping directly in line with the apron’s swing direction. - After lowering to the maintenance position, tie off the head frame to the fixed base pole section. See Figure 2.
Raising
- Before raising, check that the headframe securing bolts are tight.
- Using the rope pull the apron back towards the ground. The operator is to ensure they are positioned at a distance of the height of the pole away from the pole base and in line with the swing direction. See Figure 3. Again, it is important that the raisingmomentum developed is closely controlled. Particularly, slow the momentum as the headframe and luminaires approach the final vertical position.
- Upon the apron closing in on the fixed base section reinstall the 4 x Hex bolts and reinstall the padlock.
- Untie the rope.